

Let’s see how we can configure our NodeJs project with TypeScript in Visual Studio Code for debugging.
Following are the steps:
- Create project folder
- Initialize project with npm package.json
- Install TypeScript
- Create tsconfig.json
- Add TypeScript source file
- Create tasks.json file
- Create launch.json file
- Finally Debug
- Shortcut keys for Debugging in VS Code
Create project folder
Create project folder from the command prompt.
mkdir counter
Switch to project.
cd counter
Initialize project with npm package.json
npm init -y
Install TypeScript
npm i typescript --save-dev
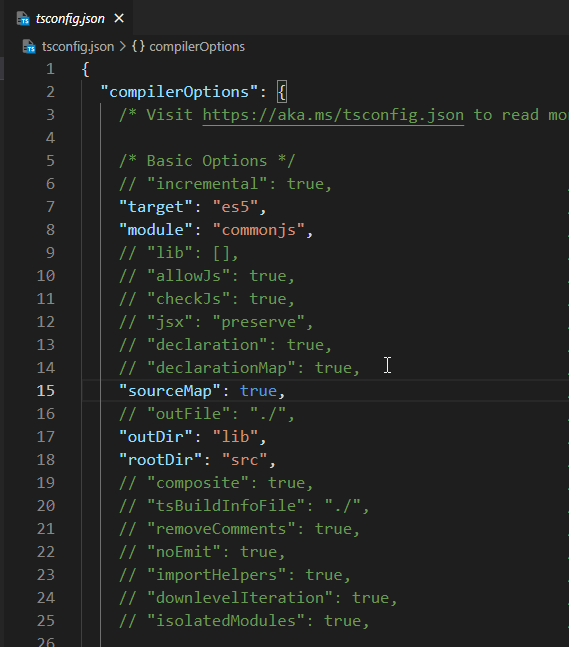
Create tsconfig.json file
npx tsc --init --sourceMap --rootDir src --outDir lib
Here our source folder is src and output folder is lib.
Open the project in VS Code.
code .
You will see the project structure like this in VS Code.

and tsconfig.json file with specified options.
Add TypeScript source file
Create source code folder src, we specified the src as root folder in configurations.

And add file index.ts, with some code.

Create tasks.json file
Press Ctrl+Shift+P

Select Tasks: Configure Default Build Task
Then select tsc:watch – tsconfig.json

This will create a tasks.json file in .vscode folder.

Now build project, press Ctrl+Shift+B
This will generate the lib folder, which is our output directory.

and because of watch configuration build will keep running in the background and watch file changes.
Create launch.json file
Click on debug > create a launch.json file.

Choose node.js from options.

This will create a launch.json will


Finally Debug
Now go to your source file you want to debug, and press F9 on line you want to add a breakpoint.

Hit F5, and execution will pause at the breakpoint.

Congrats! you are able to debug your TypeScript now in VS Code.
Shortcut keys for debugging in VS Code.
- Continue (F5)
- Step Over (F10)
- Step Into (F11)
- Step Out (Shift+F11)
- Restart (Ctrl+Shift+F5)
- Stop (Shift + F5)
Conclusion
In this tutorial we learned how we can configure NodeJs TypeScript project in VS Code for easy debugging.
We have also seen what are some of the shortcut keys for quick debugging.
Please share your feedback or any query you have.
